No Bake Nutella Cream Pie with Chocolate Crust
Today we are making a No Bake Nutella Cream Pie with Chocolate Crust! Making no bake desserts like cakes, pies and tarts are a great way to make dessert without turning on the oven (or the hassle of using a water bath?!) especially during the summer heat when you want a decadent sweet treat. What better way to do so than an easy recipe for a triple layer, crunchy and creamy chocolate no bake Nutella pie topped with cool whip?!
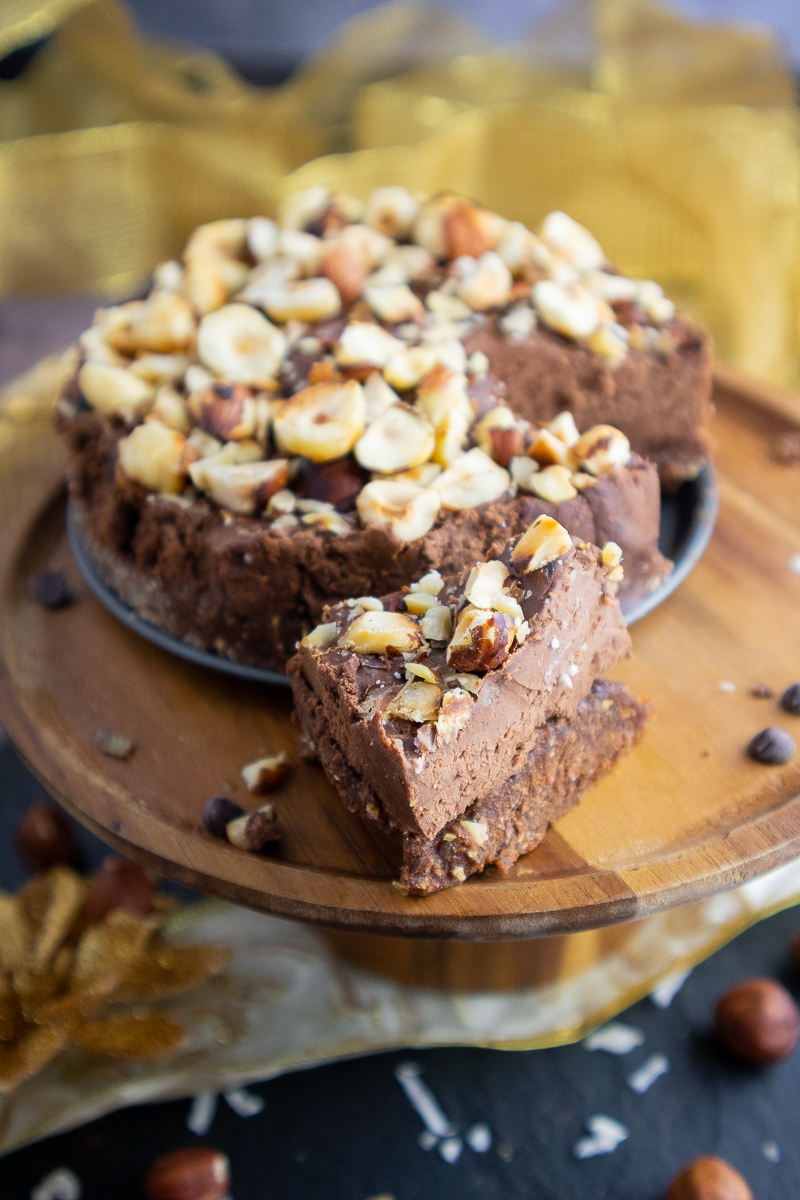
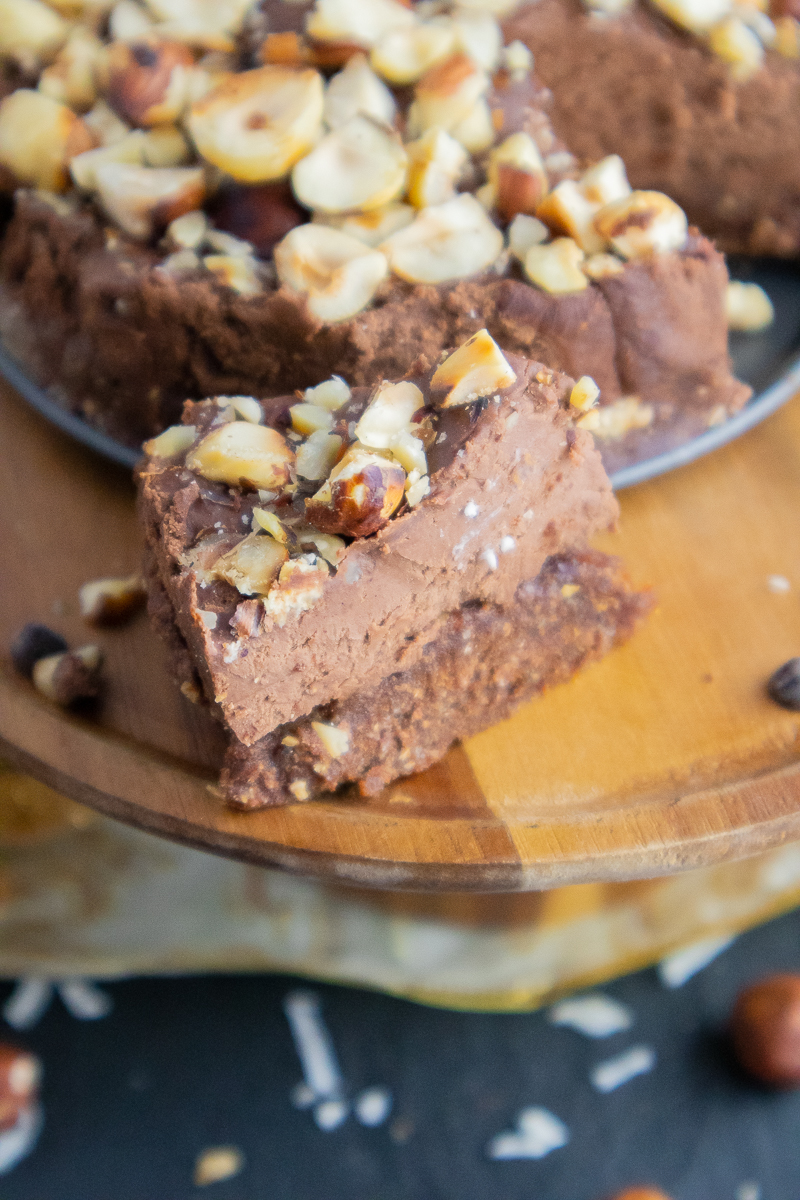
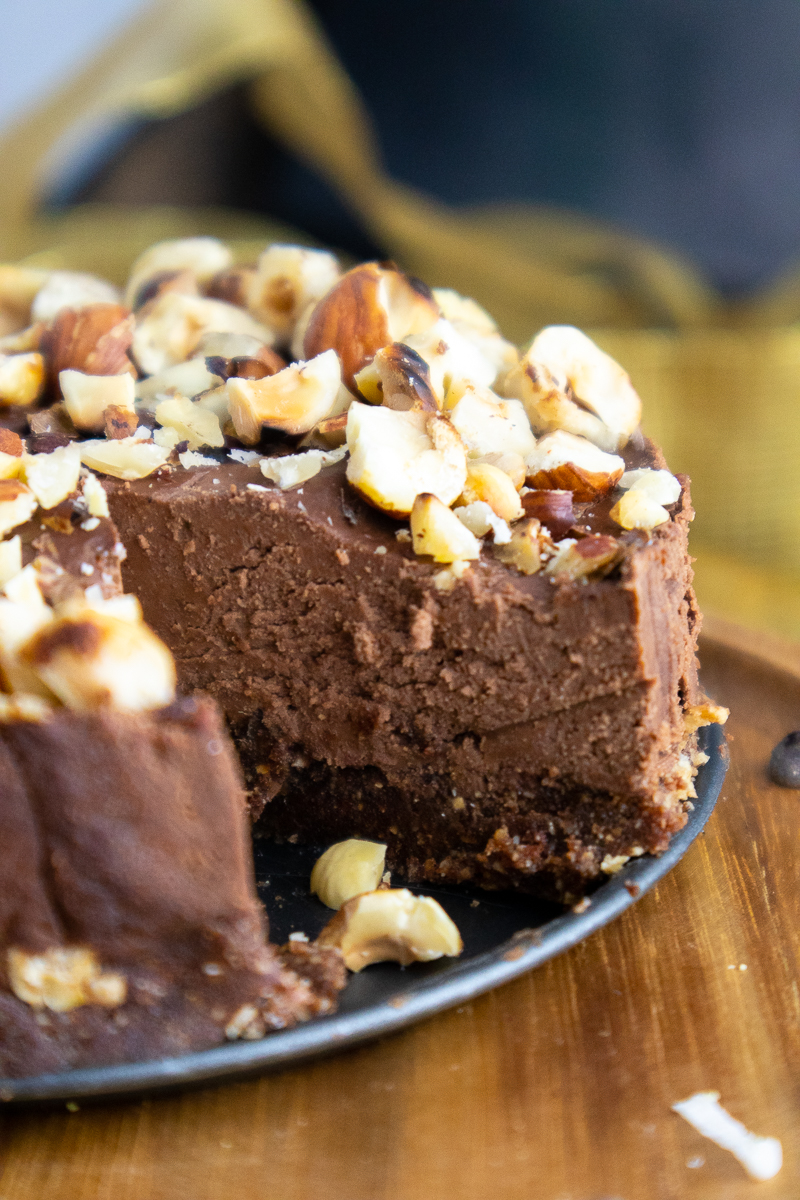
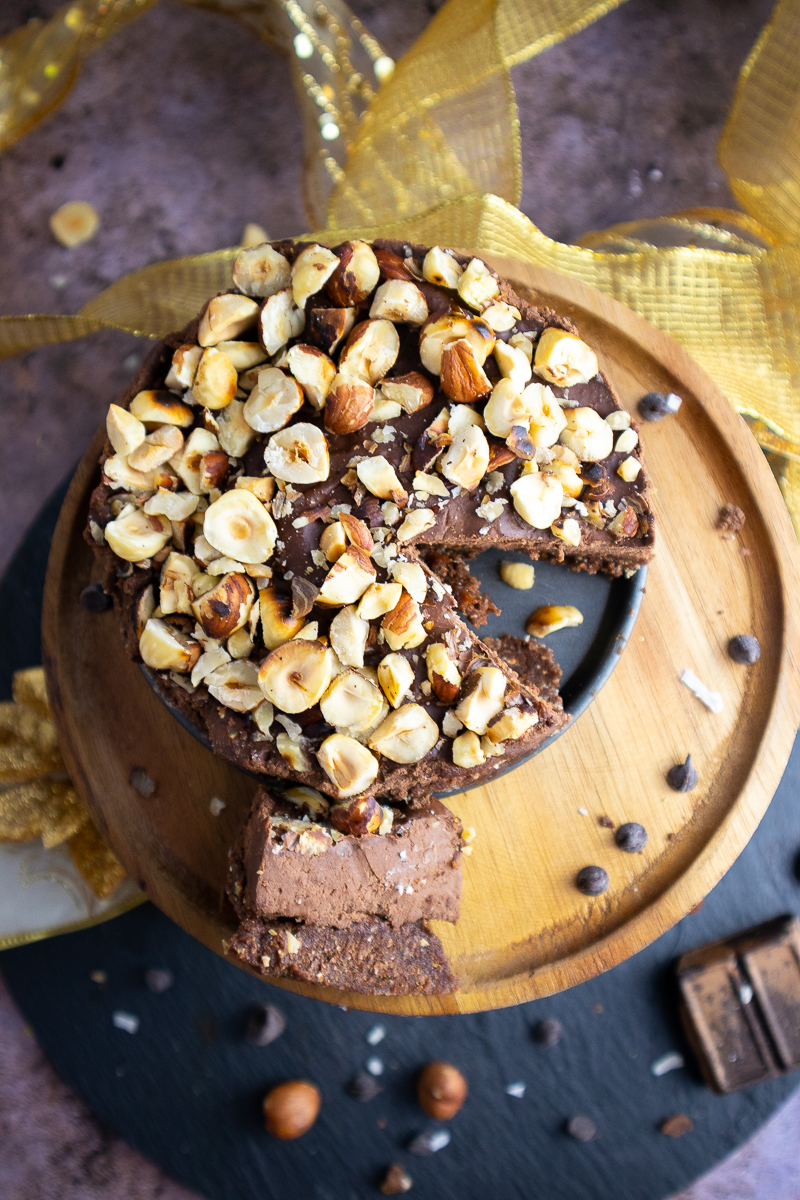
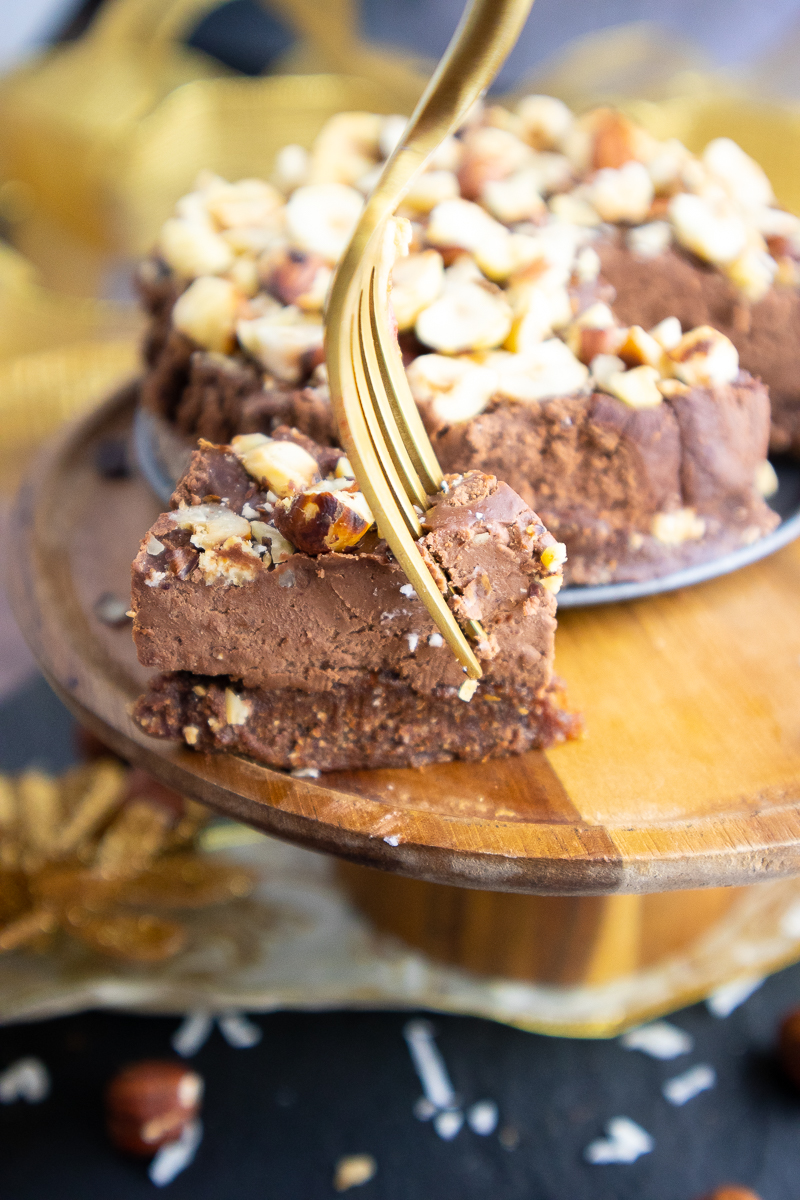
This chocolate hazelnut pie has a few simple steps to have three no bake, vegan layers to it. It starts off with a chocolate crust made of almond flour and dates as the main ingredients (no graham crackers needed here), followed by a Nutella filling using hazelnut butter and cacao (no jar of Nutella needed to make this Nutella ganache-like filling), then crushed hazelnuts for a crunchy topping!
Scroll on down to the recipe card at the bottom of the post with the full list of ingredients and instructions, or click the Jump to Recipe button at the top of the post to get there.
Why You’ll Love This No Bake Nutella Cream Pie with Chocolate Crust
Decadent without Dairy: This no bake recipe is creamy and luscious without any dairy added to it! Coconut cream acts like a heavy cream substitute, which gives desserts a creamy texture. Adding in the vegan chocolate chips makes it taste very rich with the deep cacao flavor and extra sugar, and the raw hazelnut butter gives it the Nutella flavor when combined with the chocolate – without actually using Nutella (this popular chocolate hazelnut spread isn’t vegan to begin with).
Substitutions: Crust
Medjool Dates: Medjool dates are the softest type of date variety for blending into no bake recipes, and provide a lot of dietary fiber. Deglet Noor dates may work as well, or any other very soft date. You should easily be able to squish the dates between your fingers. Using dates works well here because they’re a natural sweetener and there’s no need for other added sugars. You may be able to try plump black raisins instead of dates though. I do not recommend to use maple syrup or other liquid sweeteners for this recipe, as they will not hold the dough together as well as dates or dried fruit will.
Almond Flour: Almond flour uses blanched almonds, which have the skins removed. Because of this, it has a buttery taste and soft texture that other flours don’t necessarily have. You can use almond meal instead, but almond meal uses the almond skins. This makes it a little more bitter than its flour counterpart. Alternatively, grind raw cashews in a spice grinder to make cashew flour, which will also have a slightly buttery taste like almond flour.
Cacao Powder: This is the raw, unprocessed counterpart to cocoa powder. Cocoa powder is easier to find, as this is the type of powder commonly used in baking brownies and other chocolate desserts. You can easily substitute cacao for cocoa, or find cacao in health food stores. It’s considered a raw ingredient because it hasn’t been subjected to the same heat as cocoa powder has.
Vanilla Extract: For best results, pure vanilla extract, without added artificial colors and dyes (like caramel color). You can use artificial vanilla flavor as well. However, it may come off as more bitter and not as smooth or sweet as the pure version. The same substitutions for vanilla apply to the filling.
Substitutions: Filling
Chocolate Chips: Use semisweet chocolate for this recipe, as dark chocolate will have an underlying bitter flavor that won’t work as well here. You can use vegan semisweet chocolate chips or a chopped semisweet chocolate bar. Check the ingredient label to make sure it doesn’t contain any milk products like milk fat or milk powder, so it would be vegan.
Coconut Cream: To get coconut cream, you can either buy a can of pure coconut cream, or a can of coconut milk. If using coconut milk, buy full-fat, canned milk (I like Thai Kitchen brand). This is usually found in the international foods aisle of the grocery store. Do not substitute this with low-fat milk alternatives!
To get the coconut cream from the can of milk, you can refrigerate the can overnight. The next day, don’t shake the can when removing it from the refrigerator. Carefully open it up and you’ll notice that a thick white substance has risen to the top of the can, with the water underneath. This is the separation of the coconut cream and coconut water that makes up the milk!
You can scoop out just the coconut cream to use in this recipe, and reserve the rest of the can for another time.
Hazelnut Butter: All the hazelnut flavors are coming from this one ingredient, full of healthy fats. You can find pure hazelnut butter online (it’s made just like pure peanut butter – only one ingredient), make your own by buying raw hazelnuts, or find it at the Bulk Barn, which is a Canadian bulk food store.
Substitutions: Topping
Hazelnuts: You can find raw hazelnuts at a bulk food store, online or possibly at a health food store. Chocolate lovers can also omit the crunchy hazelnut topping and top with all chocolate chips or make chocolate curls (from a chocolate bar using a vegetable peeler!) or another topping of choice instead.
No Bake Nutella Cream Pie with Chocolate Crust Recipe Notes
- For an extra decadent dessert, top with vegan whipped cream or chocolate ice cream to serve!
More Recipes You’ll Love
Raspberry Lemon No Bake Cheesecake
No Bake Cherry White Chocolate Tart
If you make this No Bake Nutella Cream Pie with Chocolate Crust, then leave a comment and star rating! Don’t forget to tag your photos @peanut_palate on Instagram. Enjoy!

No Bake Nutella Cream Pie with Chocolate Crust
Equipment
- 7" Springform Cake Pan
- High-speed blender or food processor
- Small Saucepan to toast the hazelnuts
- Microwave to melt the chocolate
Ingredients
For the Crust
- ½ cup Medjool dates pitted
- 9 tbsp almond flour
- 1½ tbsp cacao powder
- ¼ tsp vanilla extract
- pinch pink salt
For the Filling
- ⅓ cup coconut cream
- ½ cup vegan semisweet chocolate chips melted
- ¼ cup hazelnut butter
- ¼ tsp vanilla extract
- pinch pink salt
For the Topping
- ¼ cup toasted hazelnuts skins removed, chopped
Instructions
- Grease the bottom and sides of the springform cake tray with vegan melted butter, refined coconut oil or another neutral oil or vegan butter of choice.
For the Crust
- Blend together all crust ingredients in a large bowl food processor until a dough forms. You may have to stop the food processor and scrape it down as necessary to help the blending process.
- Press the crust down in an even layer into the pan.
For the Filling
- Add the semisweet chocolate chips into a microwave-safe bowl. Microwave on 20 second intervals, stopping and stirring in between, until melted.
- Now blend together all filling ingredients, including the melted chocolate, until a creamy mixture forms.
- Pour this mixture over top of the prepared pie crust, using a rubber spatula to evenly spread it around as needed.
For the Topping
- To toast the hazelnuts, add them to a small saucepan over low heat.
- Stir them around for 1-2 minutes, until they start to toast and become golden brown. They will burn quickly, so keep an eye on them.
- You can taste test the to check if they are toasted – the hazelnut flavor will be much stronger than the raw nut.
- Turn off the heat and add the hazelnuts into a paper towel or a cloth. Rub them in the cloth to remove the skins.
- Once the skins are removed as much as possible, break up the hazelnuts into small pieces.
- Press them down into the top of the pie to cover it completely with hazelnuts.
To Set the Pie
- Place the pie in the refrigerator for at least one hour to set.
- Once set, remove it from the fridge. Slowly remove the sides of the pan, making sure the pie is not stuck to the sides of the cake pan.
- Use a pizza cutter or a sharp knife to cut the pie into 6 slices. Enjoy!
Notes
-
Storage
- Store in an airtight container in the refrigerator for up to five days.